11 Nov A Step-By-Step Guide to Creating Amazing Video Filming
Why Video Filming Mastery Matters: From Vision to Reality
The digital landscape has transformed dramatically, with video content now commanding unprecedented attention across every platform imaginable. You’re living in an era where 78% of marketing professionals report that videos have directly boosted their sales, making video filming not just a creative pursuit, but a business imperative.
When you scroll through social media or browse websites, you instantly recognize the difference between amateur smartphone recordings and professionally crafted content. That distinction isn’t accidental—it’s the result of mastering specific video filming techniques that separate compelling content from forgettable footage. Poor video quality doesn’t just look unprofessional; it actively damages your credibility and undermines your message before viewers even process your content.
The journey from concept to polished video involves multiple interconnected stages, each requiring specific skills and attention to detail. You’ll discover that successful video filming encompasses far more than simply pressing record. It demands understanding of technical fundamentals, creative vision, and systematic execution that transforms your initial idea into engaging visual storytelling.
Throughout this comprehensive guide, you’ll learn the exact processes, techniques, and strategies that professional filmmakers use to create content that captivates audiences and achieves measurable results. Whether you’re creating corporate communications, marketing materials, or creative projects, mastering these principles will elevate your work from ordinary to extraordinary.
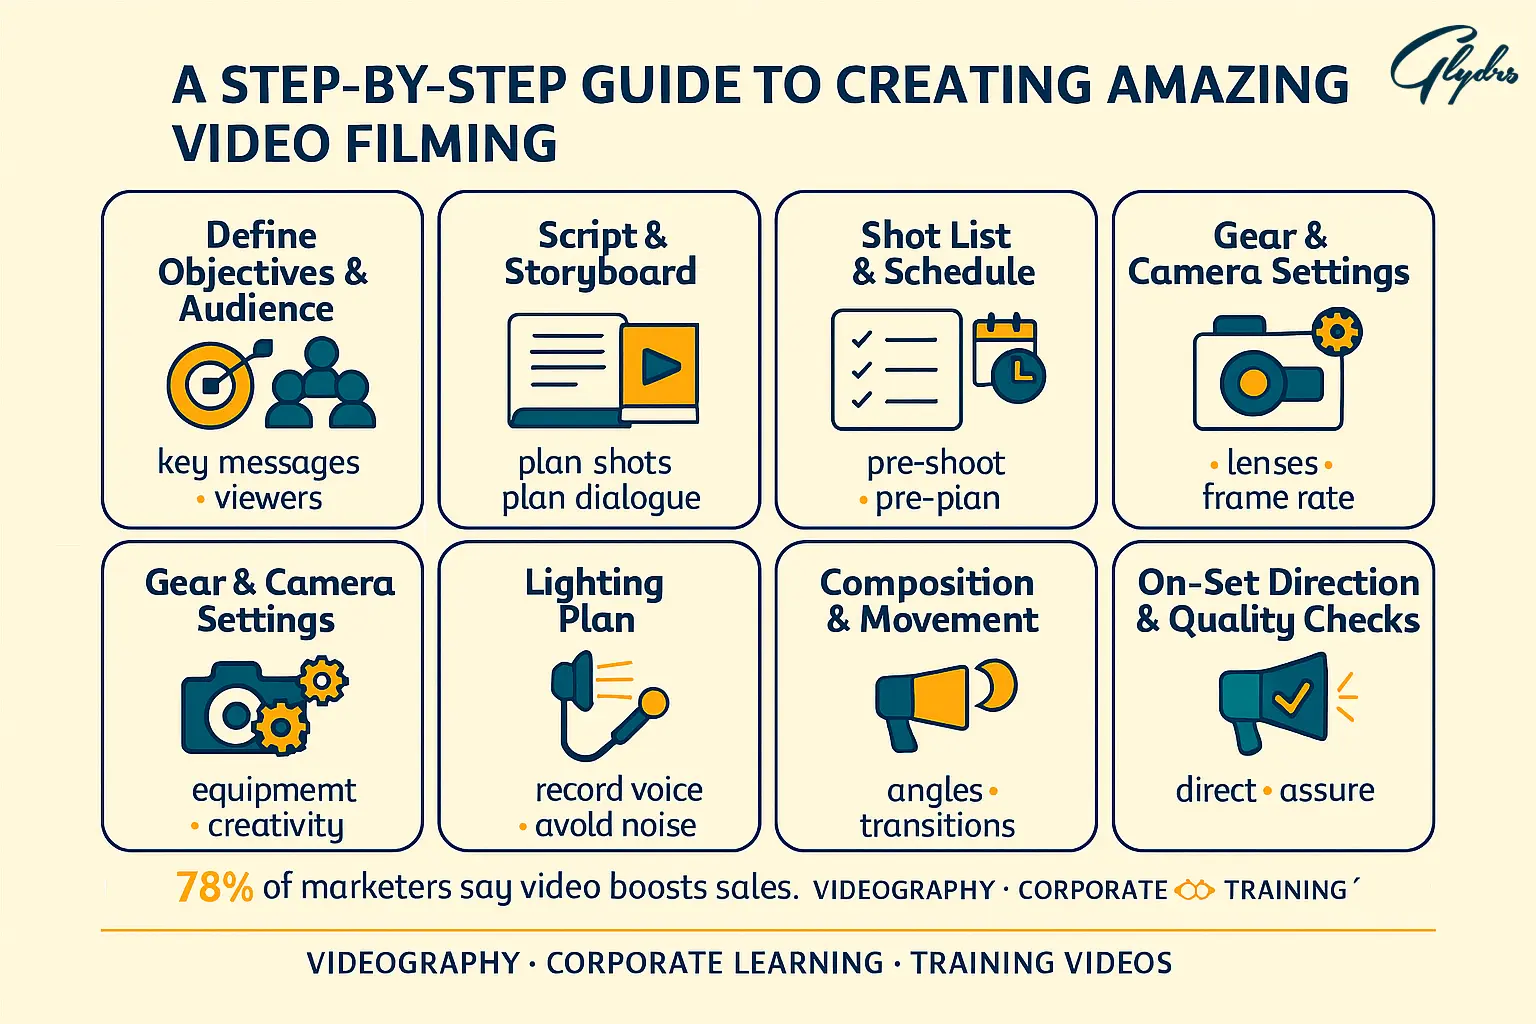
Blueprint for Success: Planning Your Video Project
Before you even touch a camera, your video’s success depends entirely on the foundation you build during the planning phase. You must begin by clearly defining your video’s primary purpose and identifying your target audience with laser precision. Ask yourself: What specific action do you want viewers to take after watching? How will this content serve their needs and interests?
Creating a compelling script forms the backbone of any successful video project. Your script should speak directly to your audience’s pain points, interests, and motivations while maintaining a conversational tone that feels authentic rather than corporate. Once your script is solid, develop a detailed storyboard that maps out each scene visually, including camera angles, lighting requirements, and any special effects or graphics you’ll incorporate.
Budget considerations will significantly impact every aspect of your production, from equipment choices to location options and talent selection. Establish realistic financial parameters early, allocating resources strategically across pre-production, production, and post-production phases. Remember that spending wisely on planning prevents costly mistakes during filming.
Location scouting requires more than finding visually appealing spaces. You need to evaluate practical considerations like ambient noise levels, lighting conditions throughout the day, electrical outlet availability, and any permit requirements. Visit potential locations at the same time of day you plan to film, bringing a camera to test how the space looks through your lens.
Building an effective team involves clearly defining roles and responsibilities for each crew member. Even small productions benefit from designated positions like director, camera operator, audio engineer, and production coordinator. When everyone understands their specific contributions, you’ll achieve smoother coordination and better results during filming.
Essential Gear: Building Your Video Filming Arsenal
Your equipment choices directly impact the professional quality of your final product, but you don’t need to break the bank to achieve excellent results. Modern smartphones can produce surprisingly high-quality footage when used correctly, making them viable options for many video filming projects, especially when paired with professional accessories.
For more demanding projects, consider investing in dedicated cameras that offer manual controls over exposure, focus, and color settings. DSLR cameras provide excellent image quality and lens flexibility, while mirrorless cameras offer similar capabilities in more compact packages. Professional camcorders excel in situations requiring extended recording times and built-in stabilization features.
Tripods and stabilization equipment are essential for professional-looking footage. Even the steadiest hands produce noticeable camera shake that immediately signals amateur production values. Invest in a sturdy tripod that can support your camera’s weight, and consider additional stabilization options like gimbals for smooth movement shots or slider systems for controlled camera motion.
Lighting equipment transforms the visual quality of your videos more dramatically than any other single investment. Basic three-point lighting setups using affordable LED panels can eliminate unflattering shadows and create professional-looking illumination. Softboxes and diffusion materials help create the gentle, even lighting that flatters subjects and maintains consistent visual quality throughout your production.
Audio recording devices deserve special attention because poor sound quality destroys otherwise excellent videos. External microphones, whether lavalier, shotgun, or handheld styles, capture significantly better audio than built-in camera microphones. Acoustic treatment materials like foam panels or even heavy blankets can dramatically improve recording environments by reducing echo and background noise.
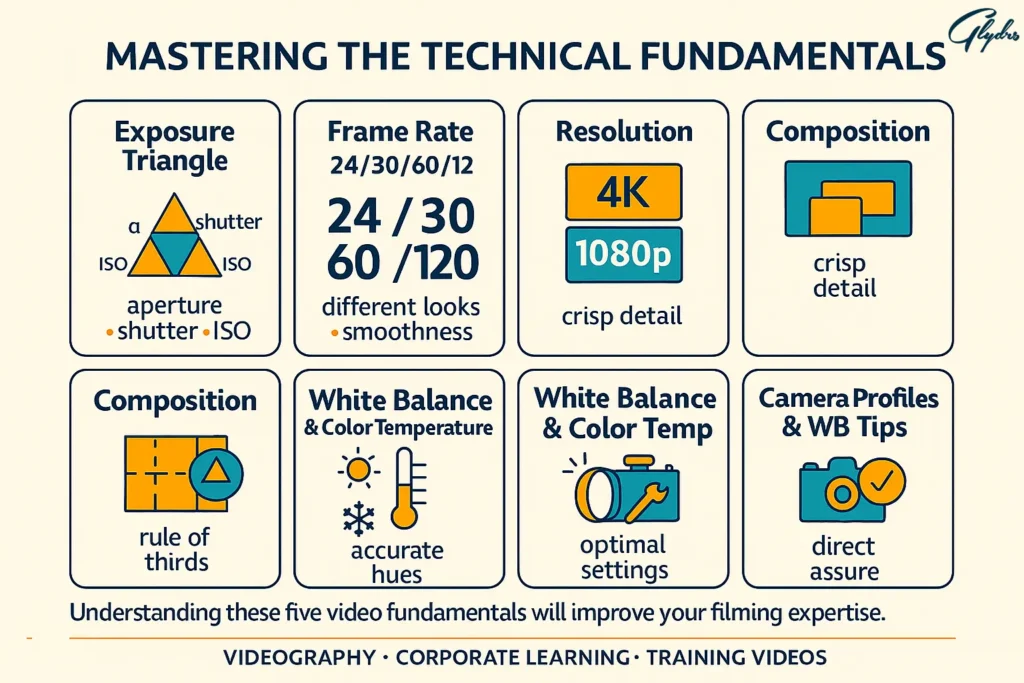
Mastering the Technical Fundamentals
Understanding your camera’s manual controls unlocks creative possibilities that automatic modes simply cannot provide. Master exposure settings, including aperture, shutter speed, and ISO, to achieve the exact look you envision. Aperture controls depth of field, determining how much of your image appears in sharp focus. Shutter speed affects motion blur and can create dramatic effects, while ISO determines your camera’s sensitivity to light.
Frame rate selection impacts the visual feel of your footage significantly. Standard frame rates like 24fps create a cinematic look, while 30fps appears more natural for most applications. Higher frame rates like 60fps or 120fps enable smooth slow-motion effects during post-production, adding dynamic visual interest to your content.
Resolution choices affect both image quality and file sizes. While 4K recording provides maximum flexibility for cropping and post-production adjustments, 1080p remains perfectly acceptable for most applications and creates more manageable file sizes. Consider your final distribution platforms when selecting resolution settings.
Composition techniques like the rule of thirds create more visually engaging shots than simply centering your subjects. Imagine dividing your frame into nine equal sections with two horizontal and two vertical lines. Positioning important elements along these lines or at their intersections creates more balanced, professional-looking compositions.
White balance and color temperature settings ensure accurate color reproduction across different lighting conditions. Daylight, tungsten, and fluorescent presets work well for consistent lighting situations, but manual white balance adjustment provides precise color accuracy for mixed lighting environments or creative color effects.
Advanced Filming Techniques That Elevate Your Content
Creative camera angles and movements add visual dynamism that keeps viewers engaged throughout your content. Low angles can make subjects appear more powerful and authoritative, while high angles create intimacy or vulnerability. Dutch angles—tilting the camera slightly—add tension or energy to scenes when used judiciously.
Camera movements should always serve your story rather than showing off technical capability. Smooth pans reveal new information or follow action naturally, while tilts can emphasize height or scale. Tracking shots that follow subjects create immersive experiences, but require careful planning and stabilization equipment to execute professionally.
Natural lighting often produces the most flattering results for video filming projects. The golden hour just after sunrise or before sunset provides warm, soft illumination that enhances skin tones and creates appealing shadows. Overcast days act like giant softboxes, providing even, diffused light perfect for interviews or product demonstrations.
When natural light isn’t sufficient, artificial lighting should supplement rather than overpower existing illumination. Key lights provide primary illumination, fill lights reduce harsh shadows, and rim lights separate subjects from backgrounds. Understanding how these lights work together enables you to create professional-looking setups in any environment.
B-roll footage—supplementary shots that support your main content—adds visual interest and provides editing flexibility. Capture wide establishing shots, detailed close-ups, and relevant action shots that relate to your primary subject matter. Quality B-roll footage can transform talking-head interviews into dynamic, engaging content.
Crystal Clear Audio: The Foundation of Professional Videos
Audio quality often determines whether viewers continue watching your content or abandon it within seconds. Poor sound quality creates immediate negative impressions that are nearly impossible to overcome, regardless of your video’s visual appeal. Professional-sounding audio requires attention to recording techniques, equipment selection, and environmental factors.
Microphone selection depends entirely on your specific filming situation and subject matter. Lavalier microphones provide hands-free operation perfect for interviews and presentations, while remaining nearly invisible on camera. Shotgun microphones capture focused audio from specific directions, making them ideal for documentary-style filming or situations where you can’t place microphones directly on subjects.
Microphone placement significantly impacts audio quality and requires careful consideration during setup. Lavalier mics should be positioned approximately six inches below the subject’s chin, hidden under clothing when possible, but never covered by fabric that might create rustling sounds. Shotgun microphones work best when positioned just outside the camera frame, pointed directly at the speaker’s mouth.
Background noise and echo can destroy otherwise professional recordings. Scout locations carefully for potential audio problems like air conditioning systems, traffic noise, or reverberant rooms with hard surfaces. Soft furnishings, curtains, and carpeting help absorb sound reflections, while strategic microphone positioning can minimize unwanted background noise.
Recording backup audio provides insurance against technical failures and gives you options during post-production. Many professional productions record audio simultaneously on multiple devices, ensuring that technical problems with one system don’t ruin entire takes. Synchronizing multiple audio sources during editing is straightforward with modern software tools.
Post-Production Preparation: Filming with Editing in Mind
Organizing footage during production saves countless hours during post-production and prevents the loss of important shots. Develop consistent file naming conventions that include dates, scene numbers, and take information. Create folders for different types of content like interviews, B-roll, and graphics, maintaining organization from the moment you start filming.
Shooting for seamless editing transitions requires thinking beyond individual shots to consider how footage will connect during post-production. Capture establishing shots before diving into close-ups, and film extra footage at the beginning and end of each take to provide editing room. Match lighting and camera settings between related shots to ensure smooth continuity.
Multiple takes and camera angles provide editing flexibility that can save projects when individual shots have problems. Film master shots that capture entire scenes, then record closer coverage of important moments. Even simple productions benefit from varying shot sizes and angles, creating opportunities to cut away from problems or emphasize key points.
Color correction considerations during filming significantly impact your post-production workflow. Consistent lighting throughout your shoot reduces color correction time, while shooting in flat color profiles preserves maximum information for professional color grading. However, if you’re not experienced with color correction, standard color profiles often produce better results straight from the camera.File management and backup strategies protect your investment in time and resources. Video filming generates large files that require reliable storage and backup systems. Use multiple storage devices and consider cloud backup options for critical projects. Organize files logically and maintain detailed logs of what you’ve captured during each filming session.

Avoiding Common Pitfalls: What Not to Do
Technical mistakes that immediately identify amateur productions include unstable footage, poor audio quality, and inconsistent lighting. Handheld camera work rarely looks professional unless specifically chosen for creative reasons. Auto-focus systems often hunt for focus during recording, creating distracting focus shifts that scream amateur. Manual focus control prevents these problems and ensures your intended subjects remain sharp throughout each shot.
Poor planning consequences cascade through every aspect of production, creating unnecessary stress and compromising final quality. Inadequate script development leads to rambling content that fails to engage viewers. Insufficient location scouting results in audio problems, lighting challenges, and logistical nightmares that could have been prevented with proper preparation.
Equipment misuse and maintenance issues can damage expensive gear and ruin filming opportunities. Always use appropriate support systems for your cameras and never exceed weight limits for tripods or gimbals. Keep batteries charged and bring backups for critical shoots. Clean lenses regularly and protect equipment from weather and physical damage.
Common composition and framing errors include centering subjects unnecessarily, creating boring static shots, and failing to consider background elements. Cluttered backgrounds distract from your main subject, while inappropriate headroom—too much or too little space above subjects’ heads—creates uncomfortable compositions. The rule of thirds provides a reliable framework for creating more engaging shots.
Audio disasters often result from inadequate monitoring during recording. Always use headphones to monitor audio quality throughout filming. Check levels regularly and listen for background noise, wind interference, or electrical hums that might not be obvious without careful attention. Address audio problems immediately rather than hoping to fix them in post-production.
Keep reading and uncover secrets that can change the way you work. What do you know about professional video production services?
The Complete Filming Process: A Step-by-Step Walkthrough
Pre-filming checklists prevent forgotten equipment and ensure smooth production days. Begin by confirming all equipment is present, charged, and functioning properly. Test cameras, microphones, and lighting equipment before arriving at your location. Verify that you have adequate storage media, backup batteries, and any necessary cables or adapters.
Setting up equipment requires systematic organization that maximizes efficiency and minimizes setup time. Position cameras first to establish your primary shooting angles, then add lighting that complements your camera positions. Audio equipment should be tested thoroughly before filming begins, with backup systems ready if needed.
Directing talent and managing the set requires clear communication and patience, especially when working with non-professional actors. Explain what you’re trying to achieve in each shot and provide specific direction about where to look, how to move, and when to speak. Create a comfortable environment that helps subjects relax and perform naturally.
Troubleshooting common on-set problems requires staying calm and having backup plans ready. Equipment failures happen even with the best preparation, so having alternative approaches keeps production moving forward. Weather changes, noise problems, and scheduling conflicts all require flexible problem-solving skills and creative solutions.
Maintaining continuity throughout filming ensures that your footage will edit together seamlessly. Pay attention to details like clothing, lighting conditions, and prop positions between different shots. Take reference photos between setups to help maintain consistency, especially during multi-day productions where conditions might change significantly.
Wrap-up procedures and equipment care protect your investment and prepare for future productions. Review footage before leaving locations to ensure you’ve captured everything needed. Clean and properly store equipment, charge batteries, and back up footage to multiple locations. Detailed production notes help during editing and inform future video filming projects.
Keep reading and uncover secrets that can change the way you work. Videography: How It Can Improve Your Videos
Tailoring Your Approach: Filming Different Video Types
Corporate and promotional video considerations require balancing professional presentation with an authentic human connection. These videos often feature interviews with executives or employees, requiring careful attention to lighting and composition that present subjects favorably. Background selection should reinforce brand identity while avoiding distractions that might undermine your message.
Interview and testimonial filming techniques focus on creating comfortable environments where subjects can speak naturally and authentically. Position cameras at eye level to create a direct connection with viewers, and use multiple camera angles to provide editing flexibility. Pay special attention to audio quality since clear speech communication is absolutely critical for these video types.
Product demonstration and unboxing videos require careful planning to showcase features effectively while maintaining viewer engagement. Use multiple camera angles to show products from various perspectives, and ensure lighting eliminates reflections or shadows that might obscure important details. Close-up shots reveal textures and details, while wider shots provide context and scale.
Event and documentary filming strategies must adapt to uncontrolled environments while capturing authentic moments and emotions. Preparation becomes even more critical since you cannot ask events to repeat for better coverage. Scout venues in advance, identify key moments you must capture, and position equipment strategically to cover important areas without disrupting activities.
Social media content optimization requires understanding platform-specific requirements and audience expectations. Vertical video formats work better for mobile viewing, while square formats maximize visibility in social media feeds. Shorter attention spans on social platforms demand faster pacing and more dynamic visuals to maintain engagement throughout your content.
Keep reading and uncover secrets that can change the way you work. Types of Videography Services for Starting Your Own Business
Your Journey to Video Excellence Starts Now
Developing your unique style as a filmmaker requires experimentation, practice, and honest self-evaluation of your work. Study videos that inspire you, analyzing their techniques and considering how you might adapt similar approaches to your own projects. Your distinctive voice as a creator will emerge through consistent practice and willingness to take creative risks.
Building a portfolio requires creating diverse content that demonstrates your range and capabilities across different types of video filming projects. Start with personal projects or volunteer opportunities that allow creative freedom while building your skills. Document your progress and maintain high standards for work you include in professional portfolios.
Staying updated with industry trends and technology ensures your skills remain relevant and competitive. Follow industry publications, attend workshops or conferences, and network with other professionals who can share insights and opportunities. Technology changes rapidly in video production, but fundamental storytelling principles remain constant.
Practice makes perfect in video production, but deliberate practice focused on specific skill development accelerates your improvement. Set specific goals for each project, whether mastering a new camera technique, improving audio quality, or developing better editing workflows. Seek feedback from other professionals and be willing to learn from both successes and failures.
Networking and collaboration opportunities often emerge from sharing your work and connecting with other creative professionals. Join local filmmaker groups, participate in online communities, and offer assistance on other people’s projects when possible. The relationships you build often lead to future opportunities and creative partnerships that enhance your career development.
Turn your goals into real achievements with our tailored services – request the service now.
Frequently Asked Questions (FAQ)
1- What’s the minimum equipment needed to start filming professional videos?
You can create professional-quality content with surprisingly minimal equipment when used skillfully. A modern smartphone with 4K recording capability, combined with a sturdy tripod, external microphone, and basic lighting kit, provides an excellent foundation for most video filming projects. This setup typically costs under $500 and can produce results that compete with much more expensive equipment when technique and planning are solid.
2- How do I achieve professional-looking lighting without expensive equipment?
Natural light remains your most powerful and affordable lighting tool. Position subjects near large windows during overcast days for beautifully soft, even illumination. For indoor filming, use inexpensive LED panels or even desk lamps with white sheets as diffusion material. The key lies in understanding light direction and quality rather than having expensive equipment.
3- What camera settings should I use for different filming scenarios?
| Scenario | Frame Rate | Aperture | ISO Range | Shutter Speed |
|---|---|---|---|---|
| Interviews | 24fps or 30fps | f/2.8–f/4 | 100–800 | 1/60s |
| Outdoor filming | 30fps | f/4–f/8 | 100–400 | 1/60s |
| Low light | 24fps | f/1.4–f/2.8 | 800–3200 | 1/50s |
| Action/Sports | 60fps | f/2.8–f/4 | 100–1600 | 1/120s |
4- How do I ensure my audio quality matches my video quality?
Audio quality requires the same attention to detail as visual elements. Always use external microphones rather than built-in camera audio, monitor sound levels through headphones during recording, and control your acoustic environment by minimizing background noise and echo. Record backup audio when possible, and never assume you can “fix it in post” if the original recording has fundamental problems.
5- What’s the best way to learn advanced filming techniques?
Combine theoretical learning with practical application through progressively challenging projects. Study professional work you admire, breaking down their techniques frame by frame. Practice specific skills deliberately—spend entire sessions working only on camera movement or lighting setups. Seek feedback from experienced professionals and don’t be afraid to experiment with creative risks on personal projects.
6- How long should I expect to spend filming versus planning?
Professional productions typically allocate time using a 1:3:6 ratio—for every hour spent planning, expect three hours filming and six hours in post-production. Thorough planning dramatically reduces filming time and prevents costly mistakes. While these ratios vary by project complexity, investing heavily in pre-production always pays dividends in smoother filming and better final results.
No Comments